Creating an Azure Cosmos DB Database in the Azure Portal
Introduction
Azure Cosmos DB is a fully-managed, globally-distributed, multi-model database. The different types of models supported by Cosmos DB are:
- Key-value
- Graph
- Column-family
- Document
Databases in Cosmos DB are highly-available and offer up to 99.999% SLA. Latency, throughput, and consistency are also guaranteed with SLAs. Cosmos DB offers you a variety of consistency models to choose from to satisfy a variety of application requirements. You can add additional regions to replicate databases in Cosmos DB and elastically scale the storage and throughput as demand increases. Even if you have not used Cosmos DB before, you can start using Cosmos DB and getting the benefits of a fully-managed, enterprise-grade database immediately if you are already using any of the following APIs that CosmosDB supports:
- SQL
- MongoDB (document)
- Gremlin (graph)
- Cassandra (column-family)
- Azure Table Storage (key-value)
Although Cosmos DB is accessible via a SQL API, the underlying storage architecture is NoSQL using JSON documents and not a relational database system. There is also a Spark connector to use Cosmos DB for real-time big data analytics.
In this Lab Step, you will create a Cosmos DB database that supports the MongoDB API. To create the database, you will first create a Cosmos DB account that holds databases of a specific model and API type. The account acts as a container for databases and is referred to as a container in some documentation.
Instructions
1. In the search bar at the top of the Azure Portal, enter cosmos. Click Azure Cosmos DB under Services:

2. Click + Add to create a new Cosmos DB account:

3. In the Basics tab of the Create Azure Cosmos DB Account blade, enter the following values leaving the defaults for any fields that are not specified:
- Resource Group: Ensure the Lab's resource group is selected (it will resemble cal-123-45).
- Account Name: ca-cosmosdb-lab-#### where you replace #### with random digits
- API: Azure Cosmos DB for MongoDB API
- Apply Free Tier Discount: Do Not Apply
- Location: West US
- Geo-redundancy: Disable (You will geo-replicate the data later in the Lab)

By default, databases in a Cosmos DB account are accessible over the internet. The Virtual networks tab contains settings that allow you to configure the Cosmos DB databases to be only accessible from within an Azure virtual network or specific subnets. You won't need that functionality for this Lab.
4. Click Review + create, then click Create.
It takes up to ten minutes for a Cosmos DB account to be created. You can monitor the progress in the deployment Overview blade that appears:

The account is ready once you see the Your deployment is complete message:

5. Click Go to resource to open the Quick start blade for the account:

The Quick start blade gives sample code for various drivers to connect to the MongoDB database. At this point, there is only the default MongoDB admin database used for managing users and access.
7. Click Overview in the Cosmos DB Account blade.
The Overview shows all of the Collections in the account and a few visuals:

A collection is where documents are stored in a document database. There are no collections until you create one. The Overview has visuals for which region the account is configured to use and monitoring graphs for the Number of requests and Request Charge. In Cosmos DB, you are charged for the amount of storage you use and the number of request units (RU). RUs are a way to normalize the amount of work required to fulfill a request. One RU is equivalent to reading 1KB of data. More complex operations use up more RUs. The Request Charge graph can help you diagnose if you need to provision more throughput. You would notice a flat line at the maximum value if you are consuming all of the available RUs. There is no built-in automatic scaling of RUs as of June 2018, but you can configure the amount of RUs provisioned at any time.
8. Click on Data Explorer.
The Data Explorer is where you can configure databases and collections in the Azure Portal.
9. Click New Database to create a database in the account:

10. In the New database form, set the following values before clicking OK:
- Database id: stocks
- Provision throughput: Unchecked

You will store fake stock ticker data in the database. The Provision throughput setting allows RUs to be shared across multiple collections in a database compared to setting the number of RUs available to each collection in the database. Provisioning throughput is useful when you have many collections and do not require a guaranteed throughput level for any collection. Provisioning throughput can help respond to unexpected spikes in any particular collection. You will only use one collection in this Lab, so there is no need to provision throughput.
After a few seconds the database appears in the Data Explorer:

11. Hover over stocks and click ellipsis (...) > New Collection to open the form for adding a collection in the Azure Portal:

Take a minute to read through the information tips for each setting. You will create a collection using the Azure CLI instead of the Azure Portal, but it is easier to see the available settings in the Portal.
Summary
In this Lab Step, you learned how to create Cosmos DB accounts and databases. You also learned about Request Units, and how they are the common currency for charges in Cosmos DB.
The Azure Portal, Azure CLI, Azure PowerShell module, and Azure REST API can all be used for creating Cosmos DB accounts and databases.
Starting an Azure Cloud Shell
Introduction
The remaining Lab Steps require a shell to issue Azure CLI and MongoDB commands. You will use Azure Cloud Shell for this purpose. Azure Cloud Shell is a shell that runs in your web browser. Cloud Shell comes with several tools installed that are useful for managing resources in Azure, such as the Azure CLI. You can choose between a Linux-style Bash shell or a PowerShell experience. You can switch between the two shell experiences at any time. Cloud Shell is backed by an Azure file share that persists a clouddrive home directory. The shell runs on a temporary host that is free to use. You only pay for the required file share storage.
Some points worth noting are:
- You are a regular user without the ability to obtain root/administrator privileges.
- The cloud shell will timeout after 20 minutes of inactivity.
Neither of these limitations will be an issue for this Lab. In this Lab Step, you will start a Bash Cloud Shell using an existing storage account.
Instructions
1. Click on the >_ Cloud Shell icon in the menu bar of the Azure Portal Dashboard:

This will open a Cloud Shell console at the bottom of your browser window.
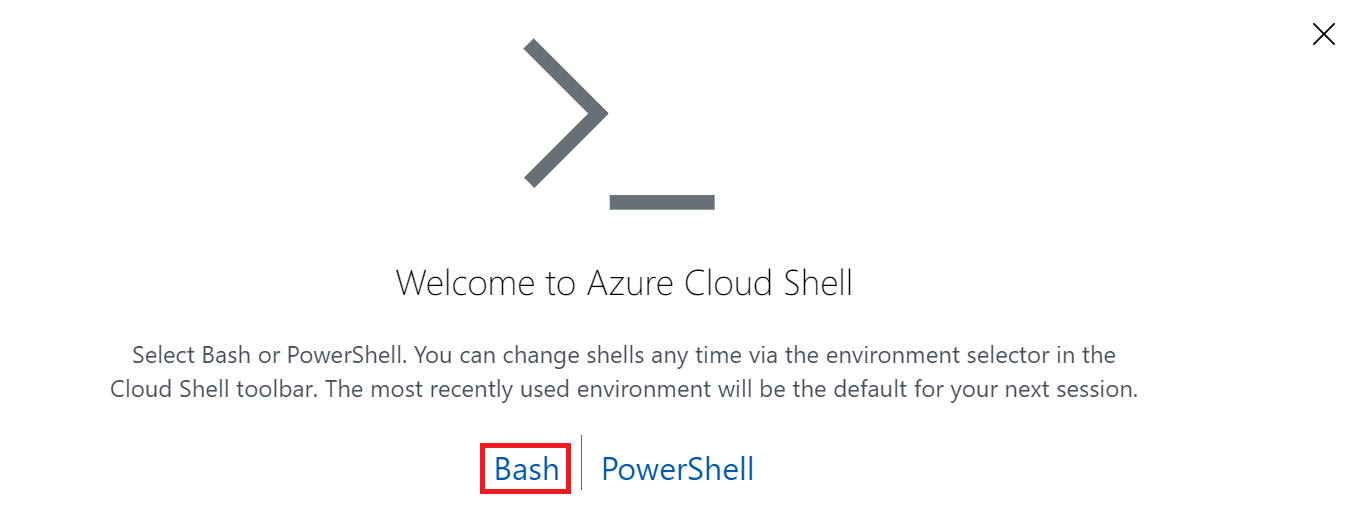
2. Select Bash for your shell experience:
3. Click on Show advanced settings to configure the shell to use existing storage resources:

4. Set the following values in the Cloud Shell storage configuration form, and then click Create storage:
- Subscription: Leave the default value
- Cloud Shell region: Choose the West US region (The Cloud Academy Lab environment created a storage account for you in this region.)
- Resource group: Use existing. Select the resource group beginning with cal-
- Storage account: Use existing. Select the only storage account available or the one beginning with cacloudshell if there are multiple
- File share: Create new. Enter cloudshell for the name of the file share

Warning: Make sure to select the region described in the instructions. The image above is only demonstrative.
Warning: If you still can't reach the storage account, make sure the deployment reached 100%. You can check it under Resource groups -> ca-lab-### -> Deployments.
The file share creation should complete within a few seconds, and your Cloud Shell will display progress as it initializes.
5. Wait until you see the prompt ending with $ indicating your Cloud Shell is ready to use:

Summary
In this Lab Step, you started a Cloud Shell from the Azure Portal. You configured the shell to use an existing storage account and created a new file share in the storage account to persist your clouddrive home directory.
Creating a Cosmos DB Collection With the Azure CLI
Introduction
The Azure CLI is a cross-platform tool for managing resources in Azure. You will use the Azure CLI to create a collection in the Cosmos DB database you created earlier.
Instructions
1. List all of the Azure CLI Cosmos DB commands available:
Copy codeaz cosmosdb -h

Read through the commands that are available. You will not use all of the commands in this Lab, but it is good to know what is available. You can also press tab twice while typing Azure CLI commands to list possible completions.
2. List the Cosmos DB account names and resource groups in table output format:
Copy codeaz cosmosdb list --output table --query '[].{Name: name, ResourceGroup: resourceGroup}'
3. Read the account name and resource group into shell variables:
Copy coderead account resource_group <<< $(!! | tail -1)
!! expands into the last command entered and tail -1 takes only the last line of output. The <<< operator causes the output of that to be input to read, which sets the account and resource_group shell variables.
4. List the databases in the account:
Copy codeaz cosmosdb mongodb database list --account-name $account --resource-group $resource_group --output table --query [].name

5. List the arguments available for creating a collection:
Copy codeaz cosmosdb mongodb collection create -h

You will use some of the arguments to create a collection next. The default indexing-policy in Cosmos DB MongoDB is to only index the _id field (compared to Cosmos DB SQL which defaults to indexing everything). This is a safe default in most situations, but you can override the behavior, if desired.
6. Create a ticker collection to store stock ticker data:
Copy codeaz cosmosdb mongodb collection create --database-name stocks --name ticker --account-name $account --resource-group $resource_group

The output displays all of the collection metadata Cosmos DB maintains. Notice only the _id key appears in the indexes.
7. Enter the following to view the default throughput assigned to the collection:
Copy codeaz cosmosdb mongodb collection throughput show --database-name stocks --name ticker --account-name $account --resource-group $resource_group

Near the end of the output you can see the default throughput is 400 RUs per second. This is the minimum amount for a fixed-size collection. The maximum size of a fixed-size collection is 10GB. To create a collection with unlimited size, you need to set the --partition-key-path and set the --throughput to be greater than or equal to 1000 RUs. 1000 is the minimum throughput for an unlimited collection. Microsoft provides a throughput planning tool to help you estimate the number of RUs per second you will need.
8. List the available arguments to the collection update command:
Copy codeaz cosmosdb mongodb collection update -h

You can update the indexing-policy after the collection is created. Note that you cannot set the partition key, meaning that you cannot automatically change a fixed-size collection to an unlimited collection. You can also update the throughput after creation using the az cosmosdb mongodb collection throughput update command.
Summary
In this Lab Step, you became familiar with Azure CLI Cosmos DB commands. You created a collection using the Azure CLI. The Azure CLI provides a way to manage Cosmos DB accounts in an automated fashion compared to manually configuring databases and collections using the Azure Portal. It is good to be familiar with both approaches.
Working with the Cosmos DB MongoDB API
Introduction
You can insert/update/delete documents in a Cosmos DB MongoDB API database using the Portal's Data Explorer tool. However, any real application documents would be coming from drivers that implement the MongoDB API. In this Lab Step, you will see both approaches by using the portal and the MongoDB shell. By using the MongoDB shell to work with Cosmos DB, you verify that the Cosmos DB implementation is fully-compliant with the MongoDB API specification and can be used in place of any MongoDB database.
Instructions
1. Return to the Cosmos DB account Data Explorer and expand stocks > ticker (Click the refresh icon to the right of COLLECTIONS if either is not visible):

There are several selections available under the ticker collection:
- Documents: Manage documents in the collection
- Scale & Settings: Configure throughput and other collection settings
The command bar also has Open Query and New Shell commands for working with documents in the collection.
2. Click on Documents to open a Mongo Documents tab:

3. Click New Document and enter the following JSON document in the editor pane:
Copy code{
  "id" : "ABC",
  "price" : 13.20
}
The id is the stock symbol and the price is the price of one share. You could also include a timestamp to record the time the price was recorded, but the Lab will use the time the document is inserted for simplicity.
4. Click Save to insert the document into the collection.
Notice an entry is added to the _id column and the editor pane updates the document to include an _id field:

MongoDB uses the _id field as a unique identifier for every document. The id field does not need to be unique, so you can insert multiple documents for the same stock symbol. The _id is an ObjectId which includes several encoded values to ensure the value is unique. A timestamp is one of the encoded values.
5. Click New Query and enter {} into the query editor:

In MongoDB, queries are represented with documents; fields in the documents are used for matching. An empty document {} matches everything.
6. Click Execute Query and observe the document you inserted is returned in the array of Results:

7. Click the Query Stats tab:

One benefit to using Portal's integrated query and shell features is that the number of RUs is reported, so you know exactly how expensive a query is.
7. Click New Shell and enter help to see the available commands:

The Portal's shell is a limited JavaScript interpreter that supports a subset of the commands available in a real MongoDB shell.
8. Enter the following to return all the documents in the ticker collection:
Copy codedb.ticker.find({})
9. Return to your Cloud Shell and Reconnect, if prompted.
10. Download a version of the MongoDB shell:
Copy codewget https://github.com/cloudacademy/cosmos-db-lab-artifacts/raw/master/mongo
11. Add execute permission for the MongoDB shell:
Copy codechmod u+x mongo
12. In the Portal, select Quick start > MongoDB Shell from the Cosmos DB blade:

13. Click the copy icon to the right of the command given in step 1 Connect using MongoDB Shell:

14. Paste the command into your Cloud Shell and replace mongo.exe at the start of the command with ./mongo.
mongo.exe is for when you are using a Windows environment.
15. Press enter to connect to the Cosmos DB API using the MongoDB shell:

You are now connected to Cosmos DB using the MongoDB shell.
16. List the available databases:
Copy codeshow dbs
![]()
17. Instruct the shell to use the stocks database:
Copy codeuse stocks
![]()
18. List the available collections in the stocks database:
Copy codedb.getCollectionNames()
![]()
19. List all the documents in the ticker collection:
Copy codedb.ticker.find({})![]()
20. Extract the timestamp from the document's ObjectId:
Copy codedb.ticker.findOne()._id.getTimestamp()
21. Insert a document into the collection:
Copy codedb.ticker.insert({id: "XYZ", price: 58.29})![]()
22. Close the connection to the database:
Copy codeexit
Summary
In this Lab Step, you worked with the Cosmos DB MongoDB API using several approaches in the Azure Portal and using the official MongoDB shell. By using the MongoDB shell, you verified that the Cosmos DB MongoDB API can be used in place of a regular MongoDB database.
Replicating the Cosmos DB Database Globally
Introduction
One of the main features of Cosmos DB is being able to replicate data globally and configure the level of consistency. Cosmos DB in a single region has an availability SLA of 99.99%. When geo-replication is enabled the SLA improves to 99.999%. When you change the level of consistency, you should be aware of potential cost implications that it may have. For example, moving from the weakest consistency model called eventual consistency to the strongest called strong consistency can double the number of RUs required for reads. In that case, you would need to double the RUs to achieve the same throughput. Also be aware that once you enable geo-replication, you can no longer use the strong consistency model. The default consistency model of session consistency provides consistent reads and writes in the context of a particular user's session. You will likely know if your application can tolerate lower levels of consistency or demands higher consistency.
This Lab Step will show you how easy it is to geo-replicate the data in the stocks database, and illustrates how to configure different levels of consistency.
Instructions
1. In the Cosmos DB account blade, click Replicate data globally:

The account is currently configured to use only a single region. The region appears under WRITE REGION because single region databases must be read/write enabled. Geo-replicas can be read-only (READ REGIONS) or read/write (WRITE REGION). At the time of writing, only one write region is allowed by default, but multi-master support is being developed to enable multiple write regions and a public preview can be opted into.
2. Find and click on the East US region in the map to select it as a read region:

You can alternatively, click Add new region and select the region from the list. In the case of having a write region in the West US, the choice of using East US as a read region is driven by business continuity and disaster recovery reasons (BCDR). Azure schedules updates and region recoveries based on paired regions. In the unlikely event of a failed update or a multi-region outage, Azure will prioritize bringing one of the two regions in a pair back online. If your resource group was created in a different region, you would choose that region's paired region for the read region for BCDR. It is not a problem to choose East US for the sake of the Lab regardless where the write region is.
To perform the same operation using the Azure CLI, you would use the update command with the following arguments:
--locations westus=0 eastus=1--resource-group "put your resource group here"- --name "put your CosmosDB name here"

3. Click Save.
It takes anywhere from a couple of minutes to ten minutes for the replication to complete. Once complete, you will automatically see a checkmark in the region hexagon.
4. Open your Cloud Shell and enter the following command:
Copy codeaz cosmosdb list
Read through the output and notice a few fields in particular:
- consistencyPolicy: Observe Session consistency is being used

- automaticFailover: Automatically failing over to a read region if the write region becomes unavailable or is disabled by default

- readLocations: Two read locations are now available. The locationName indicates which region they are, and failoverPriority indicates the priority of each location to become the new write region in the event of a failover (lower numbers are higher priority).

5. Enter the following to trigger a manual failover to the East US region:
Copy codeaz cosmosdb failover-priority-change --failover-policies eastus=0 westus=1 \
                                     --resource-group $resource_group --name $account

Manual failovers are useful for testing the end-to-end availability of applications. You can be confident your applications will continue operating as expected in the event of an Azure triggered failover. Cosmos DB guarantees zero data loss for manual failovers. Automatic failovers can lose data for an amount of time specified in the SLA.
It takes anywhere from one to three minutes for the failover to complete.
6. Connect to the database using the Mongo shell again (edit the Quick start MongoDB Shell command in the Portal to begin with ./mongo as you did in the previous Lab Step).
7. Use the stocks database:
Copy codeuse stocks
8. Run the isMaster command to see the location of the master (write) replica:
Copy codedb.isMaster()

Notice that the primary contains eastus in the hostname. This proves that MongoDB is using the East US region for the primary/write region.
8. List all the documents in the collection:
Copy codedb.ticker.find({})
All of the data has been preserved through the geo-replication and failover processes.
9. Click Default Consistency in the Cosmos DB blade:

Read through the information blocks for the different consistency models and notice that STRONG is disabled since the account is geo-replicated. There is no need to change the consistency model, just learn about the options available. The consistency can be changed using the Azure CLI update command with the --default-consistency-level argument.
Summary
In this Lab Step, you learned about the geo-replication and consistency capabilities of Cosmos DB. You created an additional read region for the account and failed over to it causing it to become the write region. You also confirmed that no data was lost using the MongoDB shell.


No comments:
Post a Comment