Azure Key Vault and Disk Encryption
Description
In this Lab, you will use the Azure Key Vault service in order to store keys and secrets used to encrypt an Azure Virtual Machine (VM). Azure Key Vault helps safeguard cryptographic keys and secrets used by cloud applications and services. By using Key Vault, you can encrypt keys and secrets (such as authentication keys, storage account keys, data encryption keys, .PFX files, and passwords) by using keys that are protected by hardware security modules (HSMs). This streamlines the key management process and enables you to maintain control of keys that access and encrypt your data.
Lab Objectives
Upon completion of this lab you will be able to:
- Use the Azure Key Vault service to store secrets and keys used for encrypting an Azure Virtual Machine
- Create an Azure Active Directory (AD) application registered to use the Azure Key Vault service
- Use PowerShell to create the Azure Key Vault, Azure virtual machine, and deploy the Azure VM Disk Encryption Extension
- View the Bitlocker encryption process on the encrypted VM
- View the Azure Key Vault secrets/keys in the Azure Portal
Lab Prerequisites
You should be familiar with:
- Basic Azure Virtual Machine and Azure Portal concepts
- Microsoft Windows operating system basics
- PowerShell and .NET familiarity are beneficial, but not required
Lab Environment
The Lab Environment has two main pieces:
- The pre-provisioned Azure virtual machine you will log into in order to perform PowerShell commands
- The PowerShell script you will use to build the Azure Key Vault and encrypted virtual machine
You will spend most of our time in the Azure PowerShell ISE and the Azure Portal. Below is a high-level diagram of the steps you will take in this Lab:

Connecting to the Virtual Machine (RDP)
Introduction
Remote Desktop Protocol (RDP) is a protocol developed by Microsoft that enables a remote connection to a Windows host. Remote Desktop uses a client/server model, whereby the initiating computer runs Remote Desktop client software to connect to the remote computer, which must run Remote Desktop server software. Remote Desktop server software is built into the Windows operating system. Windows also ships with a Remote Desktop client. Many free Remote Desktop clients exist for Linux and macOS, including those from Microsoft and Apple. The following instructions will detail how to connect using both:
- Remote Desktop on Microsoft Windows - installed by default.
- Remote Desktop for macOS - official Microsoft version available in the App Store.
Instructions will be similar for other Remote Desktop clients with different operating systems. Once your VM is in a running state, you can connect to it using a Remote Desktop client.
Instructions
1. Click the Azure Portal accordion menu ![]() in the upper-left corner followed by Virtual machines:
in the upper-left corner followed by Virtual machines:
![]()
2. Select the running ca-lab-vm VM from the list:

Note: If the VM is not listed, wait a minute and refresh the page.
3. From the Overview blade, click on the Connect > RDP command:

Note: The Overview blade displays helpful graphical information for your VM: CPU usage, disk input/output, and network traffic. Scroll up and down to view this information.
4. In the Connect to virtual machine blade that appears, click Download RDP File:

This generates and downloads a Remote Desktop file (.rdp extension) that serves as a shortcut to connect to your machine. The .rdp file is used by the Remote Desktop client to connect to the running VM.
Note: You may run into a permissions error when attempting to access the RDP file. This just means that your provisioning resources for this Lab, including the permissions that manage your user, aren't done deploying. Refresh the page every minute or so until you're able to continue.
The following instructions are divided based upon your operating system, either Windows or macOS.
Instructions for Windows
5.a. Open the downloaded .rdp file to connect to your VM.
You will see the following warning:
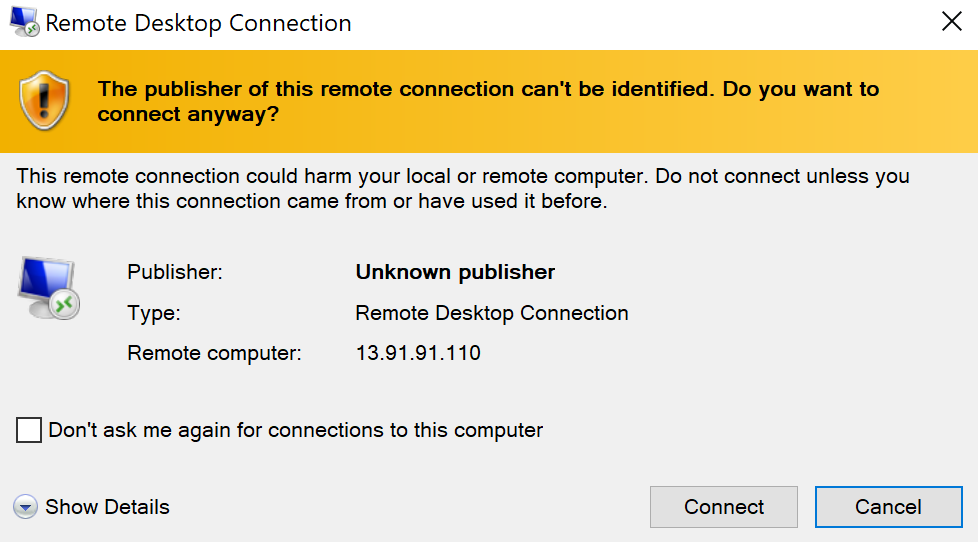
5.b. Click Connect.
You know where the .rdp file came from, so you can ignore the warning.
5.c. Enter the credentials for the VM:
- User name: student
- Password: 1Cloud_Academy_Labs!
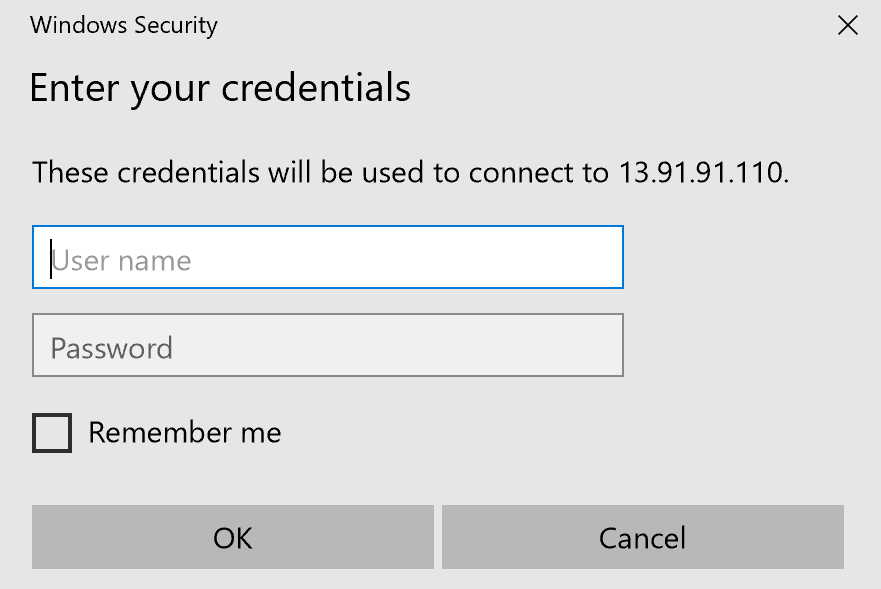
![]() Warning: If you receive a connection error instead of the credentials prompt, wait a minute and try again until the VM is ready to accept the connection. Additionally, if Mircosoft detects another account you may have to click more choices > use another account.
Warning: If you receive a connection error instead of the credentials prompt, wait a minute and try again until the VM is ready to accept the connection. Additionally, if Mircosoft detects another account you may have to click more choices > use another account.
5.d. Click Ok.
You will be prompted with a warning about the certificate not being from a trusted certifying authority:

5.e. Click Yes to bypass the warning.
This warning is expected and you can safely ignore it.
5.f. Proceed to instruction 6.
Instructions for macOS
5.a. Open the downloaded .rdp file to connect to your VM.
You will see Negotiating Credentials…
![]() Warning: If you receive a connection error, wait a minute and try again until the VM is ready to accept the connection.
Warning: If you receive a connection error, wait a minute and try again until the VM is ready to accept the connection.
5.b. When presented with the Verify Certificate dialog, click Continue:
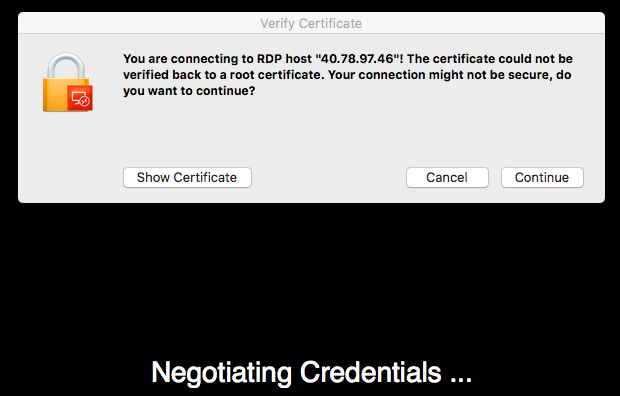
Although the certificate cannot be verified, it is safe to continue.
5.c. Enter the login credentials configured for the VM:
- User name: student
- Password: 1Cloud_Academy_Labs!
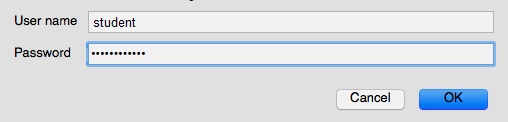
5.d. Click OK when ready. You will see "Connecting RDP..."
The following instructions are for all operating systems
6. Observe several Windows startup notifications in the Remote Desktop window.
After a few minutes, you will be able to interact with the Windows VM.
Important! The CPU and memory specifications for the VM in this lab are modest. For example, only two CPU cores. Therefore, connecting via RDP, which triggers several Windows initialization processes, causes an unresponsive user interface. In some instances, your screen may go black for 20 seconds, then transition to blue as the "Please wait for the Local Session Manager" Windows message is displayed. The entire Windows startup process typically takes a couple of minutes. After Windows is up and running, it is like any other Windows host. It is just a Windows host running in Azure.
Tip: See Troubleshoot Remote Desktop connections to a Windows-based Azure Virtual Machine if you experience lasting problems connecting to the VM.
7. Click No on the blue Network message that displays on the right side of the screen and close Server Manager by clicking the x in the top right corner of the window.
You will see the Windows Desktop:
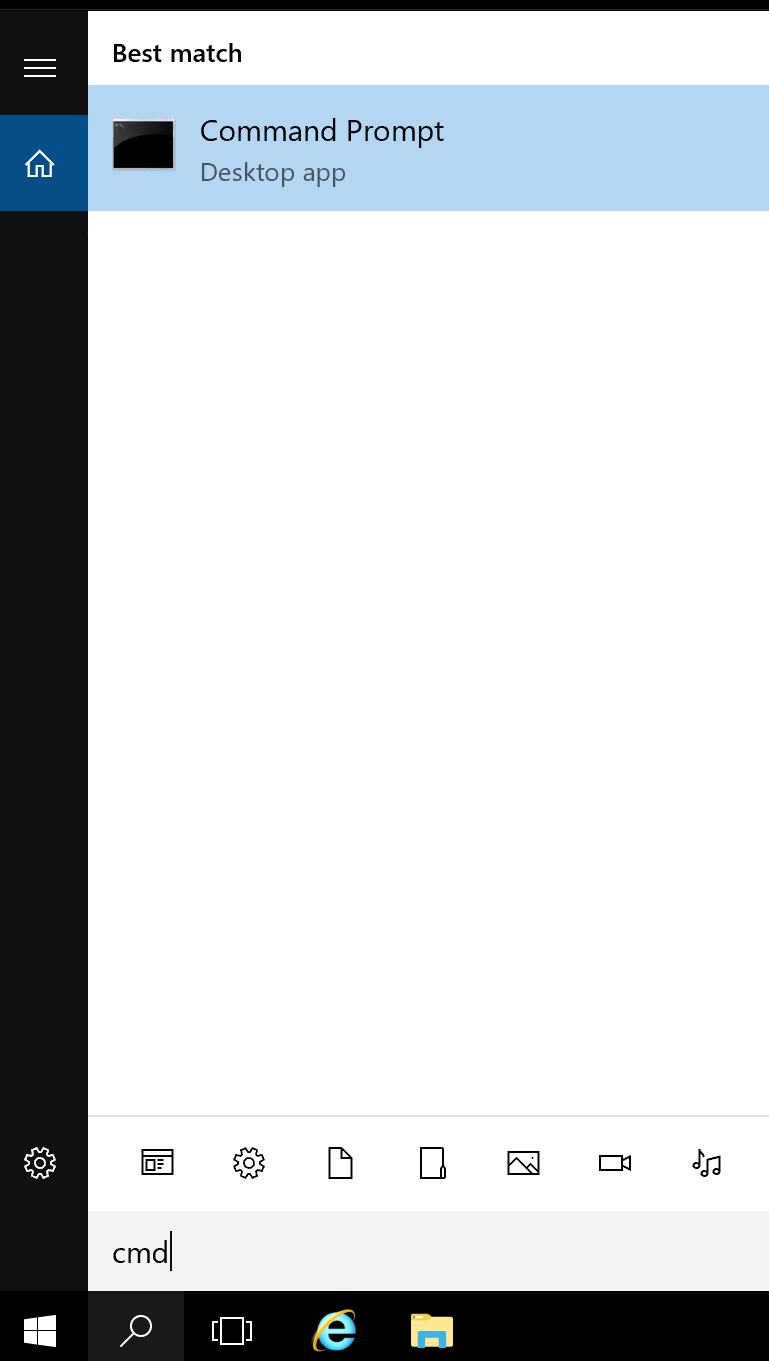
8. Click on the search icon near the bottom left corner and enter cmd. Press enter to open a command prompt.
9. Enter the following command to view system information related to the virtual machine's operating system:
Copy codesysteminfo | findstr.exe OS
The OS Name is Microsoft Windows Server.
10. Close the command prompt window by clicking the x in the upper-right corner.
Summary
In this Lab Step, you used a Remote Desktop client to connect to an Azure VM running Windows.
Viewing the PowerShell Script
Introduction
In this Lab Step, you will open the New-EncryptedVM.ps1 PowerShell script that contains the commands needed for this Lab. You will open the script using the PowerShell Integrated Scripting Environment (ISE) editor.
Instructions
1. Open a PowerShell terminal in your RDP session by clicking the magnifying glass search icon in the lower-left corner, entering Powershell, and clicking Windows PowerShell:

2. Enter the following commands to download the bootstrap script for the Lab onto your desktop:
Copy code$ProgressPreference = 'SilentlyContinue'
Invoke-WebRequest -Uri "https://raw.githubusercontent.com/cloudacademy/azure-lab-provisioners/master/keyvault-diskencryption-lab/bootstrap.ps1" `
                  -OutFile C:\Users\student\Desktop\script.ps1 -UseBasicParsing
The backtick ` at the end of the Invoke-WebRequest line tells PowerShell the command is spread over multiple lines.
3. Right-click the script.ps1 file on your desktop and select Run with PowerShell:
![]()
4. Answer A (Yes to All) to any confirmation prompts and let the script run to completion until the blue PowerShell window closes on its own. The script installs the Azure PowerShell module:

The window will close once the installation is finished. It takes a few minutes to complete.
5. Close the remaining PowerShell window.
6. Click the File Explorer icon in the bottom Taskbar:

7. Browse to C:\Scripts (This PC > Local Disk (C:) > Scripts) in File Explorer:

8. Right-click on the C:\Scripts\New-EncryptedVM.ps1 file and choose Edit to launch the PowerShell ISE editor:

9. You should see the code with syntax highlighting in the Windows PowerShell ISE similar to the image below:

In the PowerShell ISE, the top-half displays the code editor and the bottom-half displays the actual PowerShell command window where you run commands and view output. You will walk through the script highlighting particular lines of code and only running that selection of code. You may highlight any number of lines of code and press F8 to run the selection. Alternatively, you may use the Run Selection button in the editor toolbar to run the selected code:

Warning: Don't make the mistake of clicking the first Run Script play button which runs the entire script from start to finish. Make sure you always use the middle Run Selection button or press F8.
Summary
In this Lab Step, you opened and explored the New-EncryptedVM.ps1 in the PowerShell ISE.
Connecting to Azure via PowerShell
Introduction
In this Lab Step, you will use the PowerShell script to connect to your Azure account. You must make the connection so that following PowerShell commands are made as authenticated requests using the account you provide.
Instructions
1. Find your SubscriptionId in the Azure Portal. In the Azure Portal type subscriptions in the search field near the top:

2. Take note of the SubscriptionId and copy it to your clipboard as you will be using this in the PowerShell script:

3. Go back to the PowerShell script and look for the Add-AzAccount cmdlet and replace the placeholder SubscriptionId with your Subscription Id:

4. Select or highlight the entire line that contains Add-AzAccount and press F8, or click the Run Selection button in the toolbar.
5. You will be prompted to enter your Azure student credentials. Enter the same credentials you used to connect to the Azure Portal:
- Username: student-1330-625951@labscloudacademy.onmicrosoft.com
- Password: Ca1_wdee54TF

6. Notice in the PowerShell command window below the script editor, the command you selected to run displays along with the result that looks similar to the following:

Summary
In this Lab Step, you used the PowerShell script to connect to your Azure account with the appropriate SubscriptionId you've verified from the Azure Portal.
Loading Azure VM Encryption Variables
Introduction
Recall that in this Azure Lab you will create a VM and encrypt the disk which means you will need to create an Azure VM. You will also perform this in PowerShell using the same PowerShell script as our Key Vault creation.
In this step you will load the Azure VM Disk encryption variables into memory.
Instructions
1. Find the Resource Group name that has been assigned to you in the Azure Portal by browsing to Resource groups:

This Resource Group name will be the same Resource Group name for the Virtual Machine you're connected to in order to complete this lab.
2. In the PowerShell script editor, update the default values for the following variables:
- Replace the $ResourceGroupName variable in the PowerShell script with the appropriate value
- Replace the $Location variable with the Resource Group Location in the Azure Portal, if it is not the same
Also, take note of the $username and $password variables that supply the login credentials to connect to the VM you will create.
3. Highlight all the variables and Press F8 to load them into memory:

NOTE: Always check the bottom of PowerShell window to make sure you have no errors.
Summary
In this Lab Step, you used the appropriate Resource Group name assigned to you and loaded all the necessary variables for creating the virtual machine into memory.
Creating an Azure AD Application
Introduction
This lab step focuses on creating the Azure AD Application you'll use as part of the VM Encryption process and storing the keys in Azure Key Vault.
Instructions
1. Select all the lines as shown below and press F8 to run the selection:

In order for an application (in this case your PowerShell script) to gain access to Azure Key Vault, it needs to have an Identity in Azure AD thus making it an Azure AD "app registration". This app has a service principal which you may think of as an identity represented in Azure AD. There are additional variables you've also loaded into memory for later in order to create the Azure Key Vault itself. But first, take a look at the Azure AD application you just created. Note the name of the Azure AD application by looking at the variable $aadAppName.
2. In the Azure Portal, use the search box at the top of the Azure Portal, and type app registrations:

3. Explore the Azure AD app that you created. It should have the same name as the $aadAppName which you used from the script:

What this basically shows you is that you have an Azure AD app that's registered with your Azure subscription. You will use this app later to communicate with the Azure Key Vault service and use it to encrypt our VM.
Summary
Thus far you've created an Azure AD Application which you'll use as part of the VM Encryption process and store the keys in Azure Key Vault. You've also viewed its properties in the Azure Portal.
Creating the Azure Key Vault
Introduction
In this Lab Step you will create the actual Azure Key Vault in PowerShell which you will use to store keys and secrets.
Instructions
1. Select the following lines as shown below and Press F8 to Run the selection:

This will create your Azure Key Vault and output the values of the Key Vault. What is important to note is the Key Encryption Key (KEK) and the BitLocker Encryption Key (BEK). The BitLocker Encryption Key (BEK) is a secret used to encrypt a VM disk. The Key Encryption Key then wraps the BitLocker encryption key in yet another passphrase in order to protect it. Both these values are stored in the Azure Key Vault. This is very useful in the case that you want to restore an encrypted VM. These keys will be necessary for you to retrieve the encrypted VM data.
2. View the PowerShell console window at the bottom of your screen to make sure you've received no errors and that you have the Cyan output displaying your Key Vault values similar to what's show below:

3. Visit the Azure Portal to see your Key Vault. At the search box at the top in the Azure Portal, either type the name of your Key Vault directly or simply search key vaults and select your Key Vault:

4. You should see an overview of your Azure Key Vault as shown below. Click on Access policies under Settings in the left menu to view the Service Principals:

5. You should see you have two Service Principals that have access to the Key Vault:

One is your own service principal as owner. The other is the Service Principal of the Azure AD app you created earlier in this Lab.
6. Close the Access policies blade and click Keys under the Settings menu.
You will see the Key Encryption Key (KEK) that you created with the PowerShell script:

Currently, there are no secrets since you have yet to encrypt a virtual machine disk.
Summary
In this Lab Step, you created the Azure Key Vault in PowerShell which you'll use to store keys and secrets. This will be used when you encrypt your Azure VM.
Once you have completed the lab, you may read more about Azure disk encryption in the following references:
More on Azure disk encryption
https://docs.microsoft.com/en-us/azure/security/fundamentals/azure-disk-encryption-vms-vmss
http://www.deployazure.com/security/key-vault/azure-disk-encryption-recover-bitlocker/
Using PowerShell to build the Azure VM
Introduction
In this Lab Step you will create the Azure virtual machine that you will later encrypt.
Instructions
1. Select the following lines as shown below and Press F8 to Run the selection:

Note: You may see multiple warnings in orange:

They do not impact the Lab and can be ignored.
2. Check the PowerShell window at the bottom to ensure you have a successful VM and that deployment has finished:

3. You may search for the new VM EncryptWin1 in the Azure Portal to see that your Windows Virtual Machine is up and Running:

Summary
In summary, you used the script to build a new Azure virtual machine in the PowerShell ISE.
Deploying the Azure VM Disk Encryption Extension
Introduction
Azure has the ability to deploy VM Extension to Azure including Custom Script Extensions which allow you to run customized code on an Azure VM from a storage account or external GitHub source for example. In this Lab Step you are going to deploy and install the Azure VM Disk Encryption Extension using the Set-AzVmDiskEncryptionExtension command. You will pass in the necessary values such as the Key Encryption Key (KEK) you created earlier. This will in effect start BitLocker Encryption on the machine and add a "secret" to our Azure Key Vault.
Instructions
1. Select the following lines as shown below and Press F8 to Run the selection:

2. Check that the PowerShell prompt is returned to you indicating a successful deployment when the command completes:

Note: It takes up to 10 minutes for the command to complete. The process installs the disk encryption VM extension and forces a reboot to encrypt the OS disk.
3. You may also run the last line in the PowerShell script to check the status of the Disk Encryption Extension:

Note: There are no data disks on this VM which is why DataVolumesEncrypted shows NotEncrypted.
As you can see the operating system disk (OsVolumeEncrypted) now shows Encrypted. If you did have data disks to encrypt you would simply update the Set-AzureRmVMDiskEncryptionExtension command by setting the -VolumeType flag to All.
4. Head over to the Azure Portal to view your new Encrypted Azure Virtual Machine by navigating to Virtual machines > EncryptWin1 > Disks:

5. View your OS disk and its Encryption status. It should say Encryption is Enabled:

Note: You may need to refresh your browser to see the updated status.
Summary
In this Lab Step, you deployed the Azure VM Disk Encryption extension to your new virtual machine and verified the encryption status in both PowerShell and the Azure Portal.
Verifying BitLocker Drive Encryption
Introduction
In this Lab Step you will log into the VM you just created with the encrypted operating system volume and view the BitLocker drive encryption in action.
Instructions
1. Connect via RDP to the encrypted Azure VM (EncryptWin1) you created earlier and log in using the following credentials:
- User name: student
- Password: 1Cloud_Academy_Labs!
2. Click on the Start Button in the lower-left corner and click Control Panel:

3. Select System and Security:

4. Select BitLocker Drive Encryption:

5. Verify that BitLocker Drive Encryption is in fact enabled and encrypting the Operating system drive:

Summary
In this Lab Step, you verified BitLocker Drive Encryption is enabled and encrypting the Azure Virtual Machine you've created.


No comments:
Post a Comment