Working with Azure Storage Using PowerShell
Description
Lab Overview
Working with Azure Storage using PowerShell, you will get hands-on experience with different types of storage available in Azure Storage. You will set up an image storage account that stores raw images as block blobs. An Azure Table is used to store metadata about the raw images and provides support for querying the images. An Azure Queue is used to store thumbnail requests. You will use PowerShell to connect all the parts and generate Shared Access Signature (SAS) tokens for accessing the images.
Lab Objectives
Upon completion of this lab you will be able to:
- Perform Azure Resource Manager (ARM) template deployments with PowerShell
- Create and manage Blob, Table, and Queue storage with PowerShell
- Learn how to asynchronously copy blobs
- Generate SAS tokens for securing storage access
- Rotate and regenerate storage account keys
Lab Prerequisites
You should be familiar with:
- Azure Storage concepts
- Microsoft Windows operating system basics
- PowerShell and .NET familiarity are beneficial, but not required
Lab Environment
Before completing the Lab instructions, the environment will look as follows:

After completing the Lab instructions, the environment should look similar to:

Updates
December 24th, 2020 - Updated the command to install Resize-Image module
July 28th, 2020 - Updated to use managed SSD disks for the VM for improved performance
June 24th, 2020 - Updated to use the Az PowerShell module
April 29th, 2020 - Added validation check functions to validate the work done in the environment
Connecting to the Virtual Machine (RDP)
Introduction
Remote Desktop Protocol (RDP) is a protocol developed by Microsoft that enables a remote connection to a Windows host. Remote Desktop uses a client/server model, whereby the initiating computer runs Remote Desktop client software to connect to the remote computer, which must run Remote Desktop server software. Remote Desktop server software is built into the Windows operating system. Windows also ships with a Remote Desktop client. Many free Remote Desktop clients exist for Linux and macOS, including those from Microsoft and Apple. The following instructions will detail how to connect using both:
- Remote Desktop on Microsoft Windows - installed by default.
- Remote Desktop for macOS - official Microsoft version available in the App Store.
Instructions will be similar for other Remote Desktop clients with different operating systems. Once your VM is in a running state, you can connect to it using a Remote Desktop client.
Instructions
1. Click the Azure Portal accordion menu ![]() in the upper-left corner followed by Virtual machines:
in the upper-left corner followed by Virtual machines:
![]()
2. Select the running ca-lab-vm VM from the list:

Note: If the VM is not listed, wait a minute and refresh the page.
3. From the Overview blade, click on the Connect > RDP command:

Note: The Overview blade displays helpful graphical information for your VM: CPU usage, disk input/output, and network traffic. Scroll up and down to view this information.
4. In the Connect to virtual machine blade that appears, click Download RDP File:

This generates and downloads a Remote Desktop file (.rdp extension) that serves as a shortcut to connect to your machine. The .rdp file is used by the Remote Desktop client to connect to the running VM.
Note: You may run into a permissions error when attempting to access the RDP file. This just means that your provisioning resources for this Lab, including the permissions that manage your user, aren't done deploying. Refresh the page every minute or so until you're able to continue.
The following instructions are divided based upon your operating system, either Windows or macOS.
Instructions for Windows
5.a. Open the downloaded .rdp file to connect to your VM.
You will see the following warning:
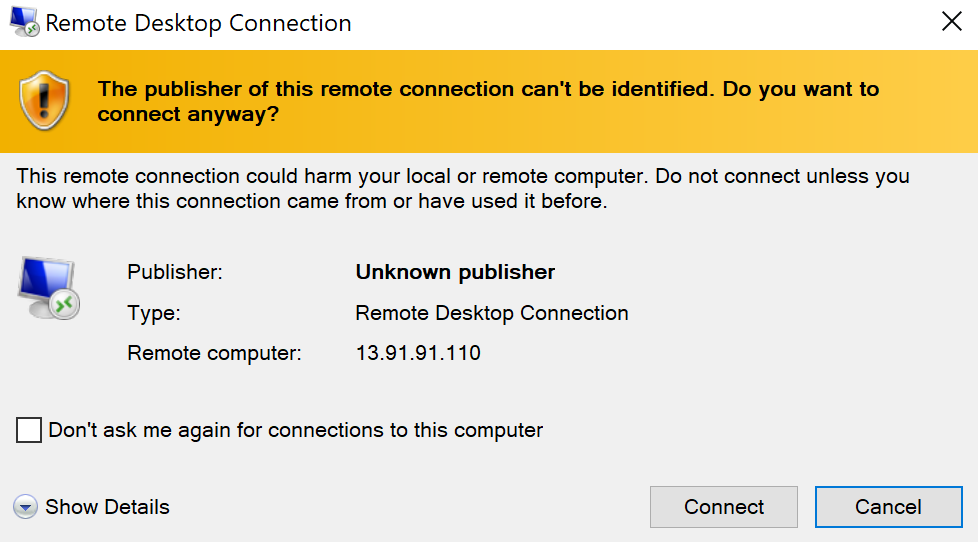
5.b. Click Connect.
You know where the .rdp file came from, so you can ignore the warning.
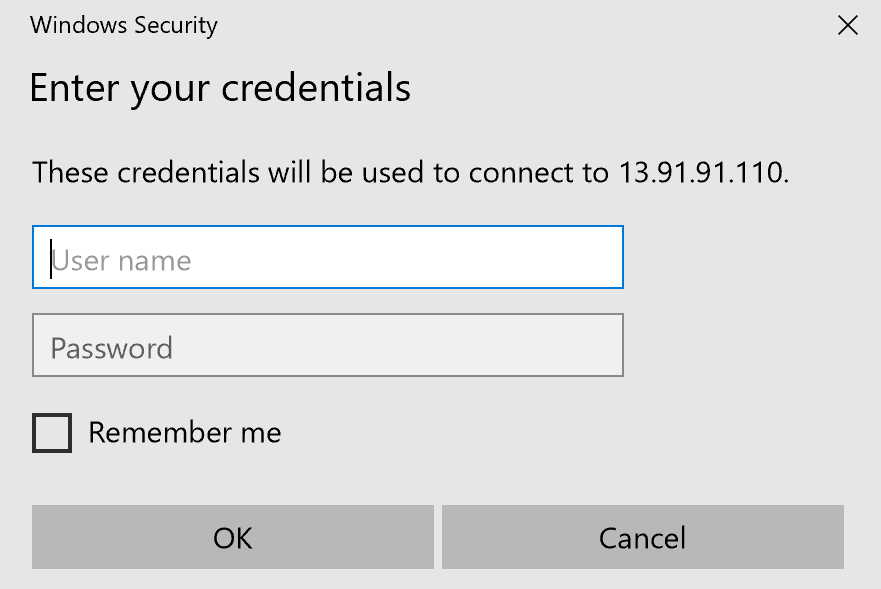
5.c. Enter the credentials for the VM:
- User name: student
- Password: 1Cloud_Academy_Labs!
![]() Warning: If you receive a connection error instead of the credentials prompt, wait a minute and try again until the VM is ready to accept the connection. Additionally, if Mircosoft detects another account you may have to click more choices > use another account.
Warning: If you receive a connection error instead of the credentials prompt, wait a minute and try again until the VM is ready to accept the connection. Additionally, if Mircosoft detects another account you may have to click more choices > use another account.
5.d. Click Ok.
You will be prompted with a warning about the certificate not being from a trusted certifying authority:

5.e. Click Yes to bypass the warning.
This warning is expected and you can safely ignore it.
5.f. Proceed to instruction 6.
Instructions for macOS
5.a. Open the downloaded .rdp file to connect to your VM.
You will see Negotiating Credentials…
![]() Warning: If you receive a connection error, wait a minute and try again until the VM is ready to accept the connection.
Warning: If you receive a connection error, wait a minute and try again until the VM is ready to accept the connection.
5.b. When presented with the Verify Certificate dialog, click Continue:
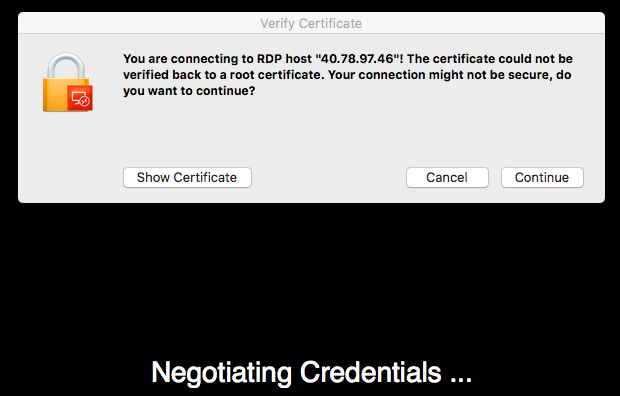
Although the certificate cannot be verified, it is safe to continue.
5.c. Enter the login credentials configured for the VM:
- User name: student
- Password: 1Cloud_Academy_Labs!
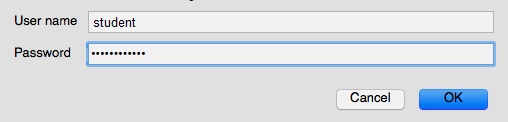
5.d. Click OK when ready. You will see "Connecting RDP..."
The following instructions are for all operating systems
6. Observe several Windows startup notifications in the Remote Desktop window.
After a few minutes, you will be able to interact with the Windows VM.
Important! The CPU and memory specifications for the VM in this lab are modest. For example, only two CPU cores. Therefore, connecting via RDP, which triggers several Windows initialization processes, causes an unresponsive user interface. In some instances, your screen may go black for 20 seconds, then transition to blue as the "Please wait for the Local Session Manager" Windows message is displayed. The entire Windows startup process typically takes a couple of minutes. After Windows is up and running, it is like any other Windows host. It is just a Windows host running in Azure.
Tip: See Troubleshoot Remote Desktop connections to a Windows-based Azure Virtual Machine if you experience lasting problems connecting to the VM.
7. Click No on the blue Network message that displays on the right side of the screen and close Server Manager by clicking the x in the top right corner of the window.
You will see the Windows Desktop:
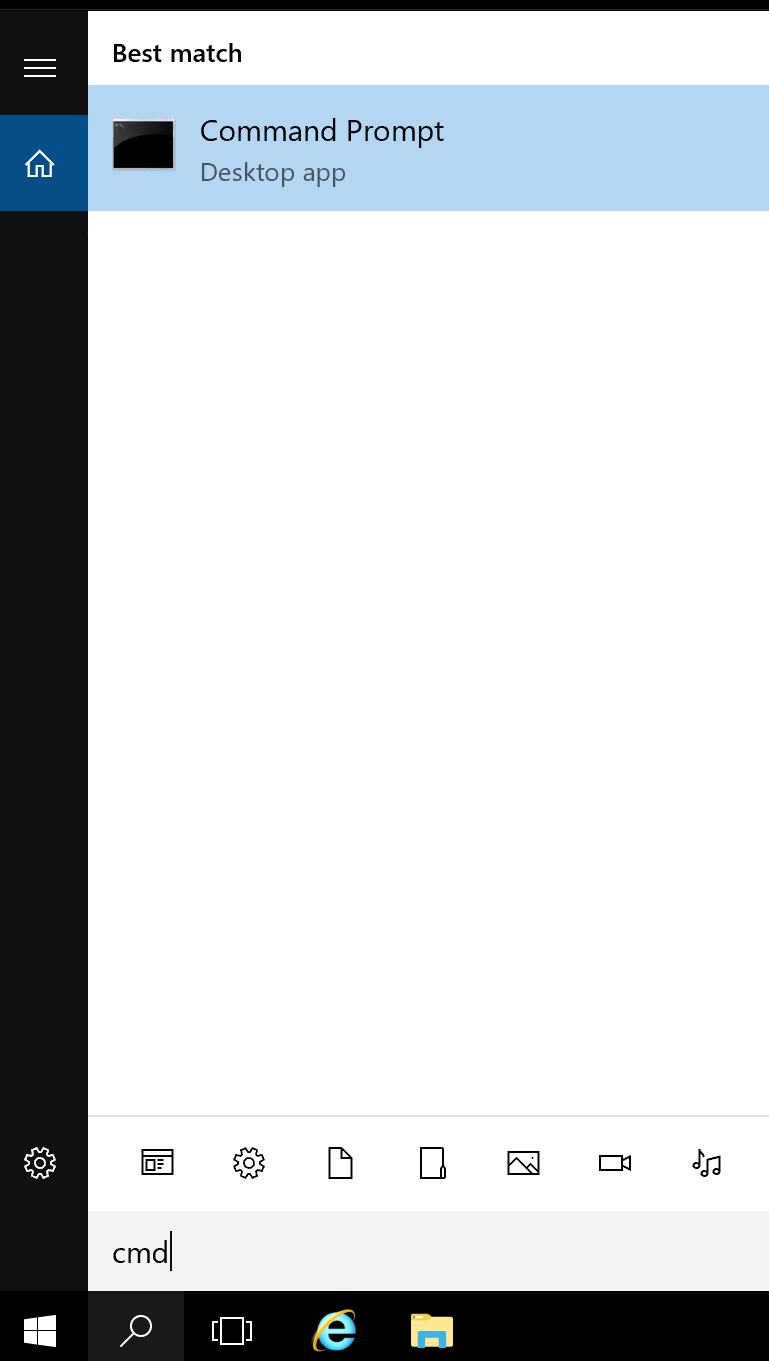
8. Click on the search icon near the bottom left corner and enter cmd. Press enter to open a command prompt.
9. Enter the following command to view system information related to the virtual machine's operating system:
Copy codesysteminfo | findstr.exe OS
The OS Name is Microsoft Windows Server.
10. Close the command prompt window by clicking the x in the upper-right corner.
Summary
In this Lab Step, you used a Remote Desktop client to connect to an Azure VM running Windows.
reating a Storage Account Using an ARM template
Introduction
Azure Resource Manager (ARM) templates allow you to specify groups of resources to be deployed together. ARM templates provide infrastructure as code allowing for quick and reproducible deployments. In this Lab Step, you will inspect an ARM template that creates a general-purpose storage account. General-purpose storage accounts can contain blob, table, queue, or file storage. You will use Azure PowerShell commands to deploy the resources specified in the ARM template.
ARM template deployments can also be performed using the Azure Portal. However, to take full advantage of infrastructure as code, you should be familiar with scripting shell commands. Automating deployments with a script is significantly faster than performing the equivalent operations in the Portal, and that benefit multiplies each time you need to perform the operation. ARM templates and Azure PowerShell are also topics that are tested on Azure certification exams.
Instructions
1. Click the magnifying glass in the lower-left corner and enter PowerShell.
2. Click on Windows PowerShell ISE:

Warning: Make sure to open it using Administrator privileges.
Windows PowerShell ISE is an integrated scripting environment that is helpful in developing PowerShell scripts:
On the left is a regular PowerShell command prompt. On the right is a Commands tab that lists all of the available PowerShell commands. Notice the common Verb-Noun naming convention of PowerShell cmdlets, e.g. Add-Computer.
3. In the PowerShell prompt, install the Azure (Az) Storage module for PowerShell by entering:
Copy code[Net.ServicePointManager]::SecurityProtocol = [Net.SecurityProtocolType]::Tls12
Install-Module Az.Storage -RequiredVersion 2.2.0
Install-Module Az.Resources -RequiredVersion 2.2.0
4. Click Yes when prompted to update the NuGet package provider:
5. When prompted about installing modules from an untrusted repository, click Yes to trust the repository and install the module. By default, the PowerShell gallery where the package lives is not configured as a Trusted repository.
It will take a few seconds to install the module. You can watch the progress from the PowerShell window:

The progress bars will all disappear when the installation completes.
6. Close the Windows PowerShell ISE Window and open a new Windows PowerShell ISE.
7. Enter Az in the Name search field in the Commands tab on the right.
The list shows all of the cmdlets that are installed with the Az.Storage and Az.Resources modules (and the Az.Accounts module they depend on). You can select any of them and click Show Details to see what parameters the cmdlet accepts. PowerShell also supports auto-completion and suggestion drop-down windows while you enter commands at the PowerShell prompt. The PowerShell Module Browser also contains more details and examples for cmdlets.
8. At the PowerShell prompt, enter the following to log your PowerShell session into Azure:
Copy codeAdd-AzAccount
A pop up will display where you can enter the credentials found in the Credentials section of this Lab.
9. View the storage account that contains your VMs virtual hard drive image by entering:
Copy codeGet-AzStorageAccount
The details of a storage account named similar to calabdiskscal123 are displayed. Azure storage account names are restricted to 3-24 alphanumeric characters. You will create a new storage account in this Lab Step.
Note: The VM uses an unmanaged disk. If the VM used a managed disk, the storage account is managed by Azure and you wouldn't see one in your account.
10. Record the value of the ResourceGroupName.
It will be similar to cal-123-12. You will need this to deploy your new storage account.
11. Click the down arrow to the right of the word Script in the command prompt header:

This exposes the script editing area.
12. In the Untitled.ps1 tab, paste in the following ARM template:
Copy code{
  "$schema": "https://schema.management.azure.com/schemas/2015-01-01/deploymentTemplate.json#",
  "contentVersion": "1.0.0.0",
  "parameters": {
    "storageAccountType": {
      "type": "string",
      "defaultValue": "Standard_LRS",
      "allowedValues": [
        "Standard_LRS",
        "Standard_GRS",
        "Standard_RAGRS",
        "Standard_ZRS",
        "Premium_LRS"
      ],
      "metadata": {
        "description": "Storage Account type."
      }
    },
    "blobEncryptionEnabled": {
      "type": "bool",
      "defaultValue": true,
      "metadata": {
        "description": "Enable or disable Blob encryption at Rest."
      }
    }
  },
  "variables": {
    "storageAccountName": "[tolower( concat('castor', substring(parameters('storageAccountType'), 0, 2), uniqueString(subscription().id, resourceGroup().id) ))]"
  },
  "resources": [
    {
      "type": "Microsoft.Storage/storageAccounts",
      "name": "[variables('storageAccountName')]",
      "apiVersion": "2016-12-01",
      "location": "[resourceGroup().location]",
      "sku": {
        "name": "[parameters('storageAccountType')]"
      },
      "kind": "Storage",
      "properties": {
        "encryption": {
          "keySource": "Microsoft.Storage",
          "services": {
            "blob": {
              "enabled": "[parameters('blobEncryptionEnabled')]"
            }
          }
        }
      }
    }
  ],
  "outputs": {
    "storageAccountName": {
      "type": "string",
      "value": "[variables('storageAccountName')]"
    }
  }
}
A full review of the template is out of the scope of this Lab, but there are some key points to highlight:
- ARM templates are declared using JavaScript Object Notation (JSON).
- ARM templates can contain
parametersthat allow you to customize the deployment based on parameter values. Each parameter,storageAccountTypeandblobEncryptionEnabled, includes adefaultValuethat is used whenever a parameter isn't specified as part of a deployment. You will use the default values, but know that a separate parameter file can be used to declare nondefault values for parameters. - ARM templates can contain
variables. In this case, a variable is used to generate a unique storage account name. Storage account names must be globally unique. - ARM templates must contain
resources. The resource, in this case, is oftypeMicrosoft.Storage/storageAccounts. The parameters and variable declared in the template are referenced in this section to customize the storage account properties. - ARM templates can contain
outputs. Outputs are values that are returned after a deployment. Since the name of the storage account is dynamically generated by the variable, it is returned as an output for convenience.
13. Select File > Save As... and enter the following values before clicking Save:
- File name: C:\Users\student\template.json
- Save as type: All Files (*.*)

14. Click on the new file icon to create a file for your deployment script:

15. Enter the following command in the file:
Copy codeNew-AzResourceGroupDeployment -ResourceGroupName <YOUR_RESOURCE_GROUP_NAME> -Name storage-deployment -TemplateFile .\template.json
where you replace <YOUR_RESOURCE_GROUP_NAME> with the name of the resource group you recorded earlier. The cmdlet verb New indicates something is being created and the noun AzureResourceGroupDeployment indicates a deployment inside of a resource group is what it will create. The Name of the deployment is storage-deployment.
16. Save the file as template-deploy.ps1.
17. Deploy the template by entering the following at the PowerShell prompt:
Copy code.\template-deploy.ps1
Your storage account should be deployed within a minute. The Parameters section will show the values used for each of the parameters. The default parameter values specified LRS and encrypted blob storage. The Outputs also shows the unique storage account name generated by the template variable.
18. List all the storage accounts by entering:
Copy codeGet-AzStorageAccount
Verify that the new storage account appears.
19. Make the new storage account the default for the current PowerShell session by entering:
Copy codeSet-AzCurrentStorageAccount -ResourceGroupName <YOUR_RESOURCE_GROUP_NAME> -StorageAccountName <NEW_STORAGE_ACCOUNT_NAME>
where you must replace:
- <YOUR_RESOURCE_GROUP_NAME> with the name of the resource group, and
- <NEW_STORAGE_ACCOUNT_NAME> with the name from the Outputs section of the deployment.
Summary
In this Lab Step, you performed a resource group deployment of an ARM template that described a storage account. You installed and used the Az PowerShell modules for storage (Az.Storage) and resource deployments (Az.Resources) to execute the commands. You also set the current storage account to be the account you created.
Working with Azure Blob Storage
Introduction
Azure Blob storage allows you to store unstructured data in Microsoft's Azure cloud. Blobs can be any sort of data. Containers are used to organize blobs within a Storage Account. You can store up to 500TB of data in a single container.
In this Lab Step, you will use the general-purpose Storage Account you created in the previous Lab Step to work with blobs. General-purpose storage accounts don't support hot or cool storage, which requires a Blob storage account. This Lab Step will focus on block blobs. Block blobs are the most general type of blob. A block blob is made up of individual blocks that can be up to 100MB in size. A block blob can include up to 50,000 blocks, giving a maximum blob size of 4.75TB. In this Lab, you will use blobs small enough to fit within a single block.
Instructions
1. Create a container called images by entering:
Copy codeNew-AzStorageContainer -Name images -Permission Off
The Permissions parameter specifies what type of anonymous read access is allowed. It can be set to:
- Container: Anonymous access to list the container contents and read blobs
- Blob: Anonymous access to read blobs
- Off: No anonymous access
The output of the command shows that PublicAccess is Off.
2. Upload a sample image to the images container:
Copy codeSet-AzStorageBlobContent -Container images -File C:\Users\student\Desktop\image.png
![]() Warning: If you receive an error message and there is no image visible on your desktop, enter the following command to download the image to the desktop:
Warning: If you receive an error message and there is no image visible on your desktop, enter the following command to download the image to the desktop:
[Net.ServicePointManager]::SecurityProtocol = [Net.SecurityProtocolType]::Tls12
Invoke-WebRequest -Uri "https://raw.githubusercontent.com/cloudacademy/azure-lab-provisioners/master/azure-storage/image.png" -OutFile C:\Users\student\Desktop\image.png
When dealing with the contents of a blob, the cmdlets end with Content. This command succeeds because you are logged in as the storage account creator, so this is not an anonymous request. By default, the BlobType parameter is BlockBlob. That is why the output shows BlobType: BlockBlob.
3. Get the blob you just uploaded from the container:
Copy code$blob = Get-AzStorageBlob -Container images -Blob image.png
It is important to note that this does not download the content of the blob.
4. Print the $blob properties:
Copy code$blob

You can tell it is the image from the Name field. The ICloudBlob property contains useful information and functions for working with the blob.
5. Get the URI of the blob:
Copy code$blob.ICloudBlob.StorageUri
This will list a PrimaryUri and a SecondaryUri. The SecondaryUri will be blank unless you are using a Geo Redundant Storage account type.
6. Copy the PrimaryUri value and open Internet Explorer by clicking on the e in the lower-left corner:

You will receive an HTTP 404 error:

This is because anonymous access is off. You need a shared access signature (SAS) to access the image.
7. Generate a SAS token by entering the following at the PowerShell prompt:
Copy codeNew-AzStorageBlobSASToken -CloudBlob $blob.ICloudBlob -Permission r
The Permission string is formed by joining the first letter of various permissions. The following apply to block blob SAS permissions:
- r: read
- w: write
- d: delete
The SAS token is written to the console. The default expiration time is one hour from the time the token is generated but can be adjusted using the ExpiryTime parameter.
8. Copy the SAS token that is output and paste it on to the end of the address in Internet Explorer.
The image should load correctly this time:

9. Upload another image, but this time specify user-defined metadata to provide additional information about the image:
Copy code$Metadata = @{ Type = "Wallpaper" }
Set-AzStorageBlobContent -Container images -File C:\Windows\Web\Wallpaper\Theme1\img13.jpg -Metadata $Metadata
The $Metadata variable contains a key-value hashtable that declares the Type of image as Wallpaper. Metadata can be very useful for filtering blobs and downloading only required blob content. If you only want to download Wallpaper images, you can use the metadata to achieve this.
10. Get a list of blobs in the container and filter out only those with Type set to Wallpaper:
Copy code$Wallpaper = Get-AzStorageBlob -Container images | Where-Object {$_.ICloudBlob.Metadata["Type"] -eq "Wallpaper"}
Get-AzStorageBlobContent -CloudBlob $Wallpaper.ICloudBlob
The Where-Object cmdlet is built into PowerShell and allows you to filter on the Metadata property of each blob's ICloudBlob.
11. Confirm that the img13.jpg blob was downloaded and the image.png blob was not by inspecting the current directory contents:
Copy codedir
12. Create a new container called Wallpapers with anonymous read and list permissions:
Copy codeNew-AzStorageContainer -Name wallpapers -Permission Container
13. Copy the wallpaper blob from the images container to the wallpapers container:
Copy codeStart-AzStorageBlobCopy -CloudBlob $Wallpaper.ICloudBlob -DestContainer wallpapers
The output will display immediately and also state the blob Length is -1. This is because the copy is asynchronous. The output verifies that the copy has started, but cannot tell you if the copy completed.
14. Check the status of the copy operation by entering:
Copy codeGet-AzStorageBlobCopyState -Blob $Wallpaper.Name -Container wallpapers
It should have a Status of Success by the time you run this command.
15. Delete the wallpaper image in the images container:
Copy codeRemove-AzStorageBlob -CloudBlob $Wallpaper.ICloudBlob
Now only image.png is in the images container.
Summary
In this Lab Step, you created containers and uploaded and downloaded block blobs. You generated a SAS token to grant read access to a blob. You also learned how to copy blobs and how to set metadata to help organize your blobs.
Working with Azure Table Storage
Introduction
Azure Table Storage is used for storing unstructured data in a NoSQL datastore. Azure Tables is made up of tables that store entities. Entities must contain three properties:
- PartitionKey: A string to determine the table partition an entity belongs to
- RowKey: A string to uniquely identify an entity in a partition
- Timestamp: A timestamp automatically generated by the Azure Table Service to indicate the last time an entity was modified
Each partition is stored on a single server. If you have a lot of entities but a small number of PartitionKey values, the table will not scale well since the partitions cannot be divided across servers. That is why it is important to plan how you will partition your table entities. Within a partition, the entities are indexed by the RowKey. If you plan to make use of range queries or queries that return more than one entity, careful selection of the RowKey can provide significant performance benefits. Each entity can have up to 252 additional properties.
In this Lab Step, you will make a table that is used to store metadata about the blobs you uploaded previously. This is a crude approximation of how Azure File Storage is implemented. By using the following:
- PartitionKey set to the blob container name
- RowKey set to the blob name
- Blobs names with directory separator characters, e.g. / or \
you can perform efficient range queries that simulate listing a directory or subdirectory. You can also limit the entity properties that are returned by table queries to make efficient use of bandwidth.
Instructions
1. From the PowerShell prompt in PowerShell ISE, create a new Azure table called blobFiles:
Copy code$TblName = "blobFiles"
New-AzStorageTable -Name $TblName
The $TblName variable stores the name of the table for convenience. Various properties of the table, including the URI for accessing the table, are output to the console.
2. Get the table you just created and store it in a variable:
Copy code$Tbl = Get-AzStorageTable -Name $TblName
You will need to access .NET objects that are attached to the table in order to work with entities.
3. Get the blob stored in the images containers from the previous Lab Step:
Copy code$Logo = Get-AzStorageBlob -Container images
The two remaining blobs are now stored in $Logo and $Wallpaper.
4. Open a new script file and paste in the following function that adds a blob file to a table:
Copy code# Function Add-Entity: Adds a blob file entity of a given type to a table.
function Add-Entity() {
  [CmdletBinding()]
  param(
    $Table,
    $Blob,
    $Type
  )

  # Use the Container name as the partition key
  $PartitionKey = $Blob.ICloudBlob.Container.Name
  # Use the blob name as the row key
  $RowKey = $Blob.Name

  $Entity = New-Object -TypeName  Microsoft.Azure.Cosmos.Table.DynamicTableEntity
  $Entity.PartitionKey = $PartitionKey
  $Entity.RowKey = $RowKey
  $Entity.Properties.Add("Type", $Type)
  $Entity.Properties.Add("StorageUri", $Blob.ICloudBlob.StorageUri.PrimaryUri.AbsoluteUri)

  $Table.CloudTable.Execute([ Microsoft.Azure.Cosmos.Table.TableOperation]::Insert($Entity))
}
The function uses the blob's container as the partition key. This implies all blobs in the same container will be in the same partition. The blob name is used as the row key. Two additional properties are also added:
Type: Describes the file type of the blobStorageUri: The URI to access the blob
The function contains some long type names, such as Microsoft.Azure.Cosmos.Table.TableOperation. These are difficult to remember. The easy way to find out what type to use is to take advantage of PowerShell's suggestions. For example, if you know you need to use the Execute command to do some operation with a table, you can hover over the Execute function to get the type of argument that must be used with it:

Similarly, once you identify the TableOperation type, you can use the suggestions to see what type of operations it supports and what type of arguments they require:

5. Save the script file as Lab-Functions.ps1.
6. Source the file to make your Add-Entity cmdlet available:
Copy code. .\Lab-Functions.ps1
7. Add an entity for each blob:
Copy codeAdd-Entity -Table $Tbl -Blob $Logo -Type "logo"
Add-Entity -Table $Tbl -Blob $Wallpaper -Type "wallpaper"
You will see an Etag column that shows the timestamp added to the entity automatically by the table service.
8. Enter the following commands to execute a query to list all of the entities in the table:
Copy code$Query = New-Object  Microsoft.Azure.Cosmos.Table.TableQuery
$Tbl.CloudTable.ExecuteQuery($Query)
The default TableQuery object doesn't declare any filters so all entities are returned.
9. Execute a query that finds all entities with a Type of wallpaper:
Copy code$Query.FilterString = "Type eq 'wallpaper'"
$Entity = $Tbl.CloudTable.ExecuteQuery($Query)
$Entity
The $Query.FilterString can be any OData formatted filter string.
![]()
10. Print the entity Type value:
Copy code$Entity.Current.Item("Type")
11. Specify to return only the StorageUri property and not the Type property:
Copy code$Columns = New-Object System.Collections.Generic.List[string]
$Columns.Add("StorageUri")
$Query.SelectColumns = $Columns
$Entity = $Tbl.CloudTable.ExecuteQuery($Query)
$Entity
Using the SelectColumns query property is especially useful when dealing with large entities. If you don't require all of the entity data this can be a significant bandwidth savings. The PartitionKey, RowKey, and Timestamp are always returned, regardless of the selected columns.
12. Attempt to print the Type of the entity:
Copy code$Entity.Current.Item("Type")An error saying that the Type key is not available is shown. This is because it was excluded from the SelectedColumns.
13. Verify that the StorageUri property is available:
Copy code$Entity.Current.Item("StorageUri")
Summary
In this Lab Step, you created an Azure table. You made entities for all of the blobs you uploaded in the previous Lab Step as a primitive file system. You also executed a query against the table using one of the properties you defined for your entities.
After completing this Lab, you can browse the Microsoft's official docs on Azure for .NET Developers to learn more about what is available
Working with Azure Queue Storage
Introduction
With Azure Queue storage, you are able to process messages asynchronously using a highly available and durable queue. Queues are great for decoupling application components and building scalable systems. The message content can be up to 64KB.
In this Lab Step, you will use a queue to asynchronously create thumbnails of the images previously uploaded to blob storage.
Instructions
1. Enter the following commands at the PowerShell prompt to create a new queue named thumbnail-queue:
Copy code$QueueName = "thumbnail-queue"
$Queue = New-AzStorageQueue –Name $QueueName
Queue names can be between 3 and 63 characters and must be comprised of lower-case letters, numbers and hyphens. As was the case with blob and table storage, the returned object is used for interacting with the queue.
2. Explore the properties and functions available for the queue by typing $Queue.CloudQueue. at the PowerShell prompt:

You will use the AddMessage function to add a message to the queue, and the GetMessage and DeleteMessage functions to get a message to process and remove it from the queue when finished.
3. In the Lab-Functions.ps1 script that is open in the script editor, paste the following function at the bottom for adding a message to a queue:
Copy code# Add message to a queue
function Add-Message() {
  [CmdletBinding()]
  param(
    $Queue,
    $Blob
  )
  # Generate read-only SAS token for the blob
  $Sas = New-AzStorageBlobSASToken -CloudBlob $Blob.ICloudBlob -Permission r

  # Message contains blob StorageUri and Name (what is needed to generate the thumbnail)
  $MessageHashTable = @{ StorageUri = $Blob.ICloudBlob.StorageUri.PrimaryUri;
                         Sas = $Sas;
                         Name = "$($Blob.ICloudBlob.Container.Name)\$($Blob.Name)" }

  # Convert the hash table to a JSON string
  $Message = ConvertTo-Json -InputObject $MessageHashTable

  # Construct a CloudQueueMessage with the serialized message
  $QueueMessage = New-Object -TypeName Microsoft.Azure.Storage.Queue.CloudQueueMessage `
                             -ArgumentList $Message

  # Add the message to the queue
  $Queue.CloudQueue.AddMessage($QueueMessage)
}
Read the comments to understand the function. The message contains what is required to generate a thumbnail for the blob:
- A URI to download the image
- A SAS token to grant read permission to download the image
- A name for the thumbnail. The name is constructed by joining the container name and the blob name.
Note: In PowerShell, the backtick ` at the end of a line extends a command over the following line. For example, the $QueueMessage line uses a backtick to improve readability. It is important not to add any extra spaces after the backtick or the following line won't be interpreted as part of the command.
4. Source the Lab-Functions.ps1 script:
Copy code. .\Lab-Functions.ps1
5. Add a message to the queue for each blob:
Copy codeAdd-Message -Queue $Queue -Blob $Logo
$Wallpaper = Get-AzStorageBlob -Container wallpapers
Add-Message -Queue $Queue -Blob $Wallpaper
The wallpaper blob needs to be updated since the previous reference was not to the blob in the wallpapers container.
6. Confirm that the queue has two messages:
Copy code$Queue = Get-AzStorageQueue -Name $QueueName
$Queue.ApproximateMessageCount
The number is only an approximation because of the distributed nature of the queue. In this case, there is not a lot of traffic on the queue and it will be the correct count.
7. In order to generate thumbnails, you need to download and import the Resize-Image module into PowerShell:
Copy codeInstall-Module -Name ResizeImageModule
8. Add the following function for processing messages at the bottom of the Lab-Functions.ps1 script:
Copy code# Process a message if one is available and remove it when complete
function Process-Message() {
  [CmdletBinding()]
  param(
    $Queue
  )

  # Set the number of seconds to make a queue message invisible while processing
  $InvisibleTimeout = [System.TimeSpan]::FromSeconds(10)

  # Attempt to get a message from the queue
  $QueueMessage = $Queue.CloudQueue.GetMessage($InvisibleTimeout)

  if ($QueueMessage -eq $null) {
    Write-Host "Empty queue"
    return
  }

  # Deserialize the JSON message
  $MessageHashTable = ConvertFrom-Json -InputObject $QueueMessage.AsString

  # Download the image to a temp file
  $TempFile = [System.IO.Path]::GetTempFileName()
  Invoke-WebRequest -Uri "$($MessageHashTable.StorageUri)$($MessageHashTable.Sas)" `
                    -OutFile $TempFile

  # Resize the image
  $ThumbnailFile = "$($TempFile)_thumb"
  Resize-Image -InputFile $TempFile -OutputFile $ThumbnailFile -Height 100 -Width 300

  # Upload the thumbnail to the thumbnails container
  Set-AzStorageBlobContent -File $ThumbnailFile `
                           -Container thumbnails `
                           -Blob $MessageHashTable.Name

  Write-Host "Finished Processing"

  # Delete the message from the queue
  $Queue.CloudQueue.DeleteMessage($QueueMessage)
}
Read through the function to gain an understanding of what it is doing. The semantics of working with queue messages is as follows:
- Get a message from the queue. This will not remove the message. It will only make it invisible for a specified amount of time.
- Process the message
- When processing finishes successfully, remove the message from the queue.
If the processing fails for some reason, the invisible timeout will be reached and the message will be available to retry processing. By default, the message will be removed after seven days. Your application can remove messages that continually fail to process successfully by making use of the DequeueCount property of the message. DequeueCount is automatically incremented each time an attempt is made.
9. Create the thumbnails blob container with full read access:
Copy codeNew-AzStorageContainer -Name thumbnails -Permission Container
10. Source the Lab-Functions.ps1 script:
Copy code. .\Lab-Functions.ps1
11. Call the function Process-Message cmdlet a few times:
Copy codeProcess-Message -Queue $Queue
Process-Message -Queue $Queue
Process-Message -Queue $Queue
Observe the output and make sure it matches your expectation given the number of messages in the queue.
12. Get the URI of the thumbnails container:
Copy code$thumbnails = Get-AzStorageContainer -Name thumbnails
$thumbnails.CloudBlobContainer.StorageUri.PrimaryUri.AbsoluteUri
13. Copy the URI and paste it into the address bar of Internet Explorer and append ?restype=container&comp=list to the end:

You can list the blobs in the container without a SAS token because the container has Container permissions. The Url property of each blob in the list can be used to view the thumbnails.
14. Browse to the Urls of the thumbnails in Internet Explorer to confirm the thumbnail generation worked correctly:

Summary
In this Lab Step, you created an Azure queue. You used the queue to pass messages containing requests to generate thumbnails for uploaded blob images. In practice, you could have many clients sending the messages and many servers processing them. The beautiful thing about queues is that everything works the same if there are more clients and servers. Finally you browsed the thumbnails container and verified the thumbnail generation worked correctly.
Working with Azure Storage Account Keys
Introduction
Every storage account comes with two access keys. They are referred to as key1 and key2. Each access key grants full access to the storage account and should be closely guarded. However, there may be situations where you need to use an access key. As a security best practice, it is a good idea to periodically rotate and regenerate your storage account's access keys. To avoid downtime, you must first regenerate the key that is not being used by clients. Assume that clients are all using key2. Then, you first regenerate key1. Next, update clients to use the new key1. Finally, key2 can be regenerated.
In this Lab Step, you will see how to use PowerShell to manage storage account access keys.
Instructions
1. List the two storage account access keys by entering:
Copy codeGet-AzStorageAccountKey -ResourceGroupName <YOUR_RESOURCE_GROUP_NAME> -Name <NEW_STORAGE_ACCOUNT_NAME>
You can easily find the name of your resource group by entering Get-AzResourceGroup and the storage account name can be found by entering Get-AzStorageAccount.
2. Regenerate key1 by entering:
Copy codeNew-AzStorageAccountKey -ResourceGroupName <YOUR_RESOURCE_GROUP_NAME> -Name <NEW_STORAGE_ACCOUNT_NAME> -KeyName key1
3. Regenerate key2 by entering:
Copy codeNew-AzStorageAccountKey -ResourceGroupName <YOUR_RESOURCE_GROUP_NAME> -Name <NEW_STORAGE_ACCOUNT_NAME> -KeyName key2
4. List the keys to verify they are not the same as before:
Copy codeGet-AzStorageAccountKey -ResourceGroupName <YOUR_RESOURCE_GROUP_NAME> -Name <NEW_STORAGE_ACCOUNT_NAME>
Summary
In this Lab Step, you learned how to access and regenerate storage account access keys.


No comments:
Post a Comment